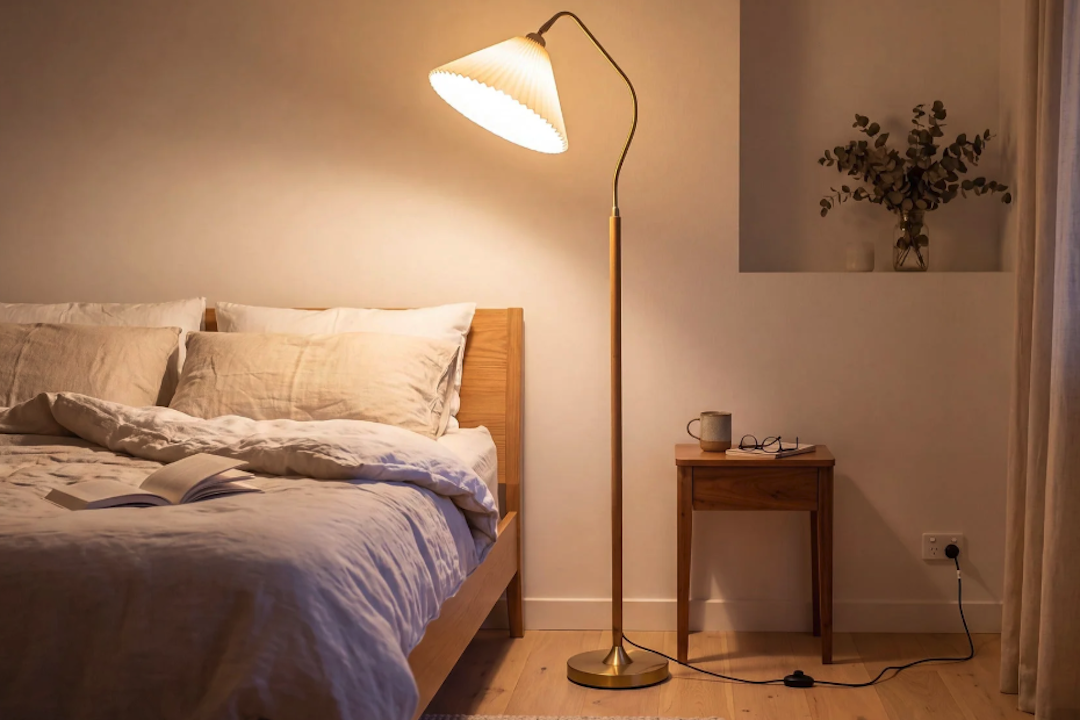


Adding a bedside floor lamp to your bedroom can really transform the space, making it feel cozier and more functional. The good news is, installing one is usually a straightforward process that most people can handle without needing an electrician. Generally, you just need to unbox it, assemble a few parts, position it correctly, and plug it in. This article will walk you through the practical steps to get your new lamp set up and shining just right.
Getting Started: What You’ll Need and Initial Checks
Before you even open the box, a little preparation goes a long way. Having the right tools and knowing what to expect can save you time and frustration. Most bedside floor lamps are designed for easy assembly, but it’s always good to be ready.
Tools and Supplies for Assembly
You probably won’t need a whole toolbox for this. Most floor lamps come with everything required, but it’s handy to have these on standby:
- Scissors or a box cutter: For opening the packaging. Be careful not to scratch or cut the lamp parts inside.
- Screwdriver (Phillips or flathead): Some lamps might have a few screws for attaching the base or securing the pole sections. Check the instructions to see what’s specified.
- Pliers (optional): Occasionally useful for tightening a nut that might be a bit stubborn, but usually not necessary.
- The bulb (if not included): Make sure you have the correct type and wattage as recommended by the lamp manufacturer. LED bulbs are usually a great choice for bedside lamps due to their efficiency and cooler operating temperature.
- A clean, soft cloth: For wiping down any dust or fingerprints after assembly.
- The lamp’s instruction manual: Seriously, read it. Even if you’ve assembled lamps before, each model can have its quirks.
Unboxing and Inspecting Components
Once you’ve gathered your supplies, it’s time to carefully unbox your new lamp.
- Lay out a protective surface: A blanket or the cardboard box itself can protect your floor or table from scratches, and the lamp parts from damage.
- Remove all packaging materials: Take everything out of the box, including any foam, plastic bags, or cardboard inserts. Make sure you don’t accidentally throw away small parts like screws or washers with the packaging.
- Check for damage: Give all the lamp components a quick once-over. Look for dents, scratches, bent parts, or frayed wires. If you find any significant damage, it’s best to contact the retailer before proceeding.
- Verify all parts are present: Compare the contents with the parts list in the instruction manual. Missing a small screw or a pole section can halt your installation.
Assembling Your Bedside Floor Lamp
This is where your lamp starts to take shape. Most floor lamps follow a similar assembly pattern, usually involving connecting pole sections, attaching a base, and then adding the lampshade.
Connecting the Pole Sections
Many floor lamps come in several pieces that screw together to form the main pole.
- Start from the base: Typically, you’ll attach the first pole section to the lamp’s base. This connection often involves screwing a threaded rod from the base into the bottom of the first pole section, or vice-versa. Make sure the connection is snug but don’t overtighten, especially if it’s plastic, as you could strip the threads.
- Thread the cord: As you connect each pole section, pay attention to the electrical cord. It usually runs through the center of the pole. Ensure the cord isn’t twisted or pinched between sections. Gently feed any excess cord through the bottom as you connect the top sections.
- Screw sections together: Continue screwing the pole sections together one by one. Many modern lamps use a simple screw-in design where one section threads into the next. Again, tighten firmly but avoid excessive force. If a section feels wobbly, unscrew it and try again, ensuring the threads are properly aligned.
- Secure the top section: The very top section usually houses the light socket. Make sure this is securely attached and that no wires are exposed or frayed near the socket.
Attaching the Base
The base is crucial for stability. It’s often the heaviest part of the lamp.
- Identify the connection point: The base will have a central hole or a threaded rod designed to connect to the bottom pole section.
- Align and secure: If the pole screws into the base, simply twist it until it’s firm. If the base needs to be attached with screws or a nut from underneath, make sure to use the provided hardware and tighten it securely. A wobbly base means a wobbly lamp, which is a safety hazard.
- Check for levelness: Once the base is attached, set the entire pole upright for a moment (even without the shade) to ensure it stands straight and doesn’t lean. Adjust if necessary.
Installing the Lampshade
The lampshade is what defines the lamp’s aesthetic and directs the light. This part varies most by lamp design.
- Harp and finial style: Many traditional lamps use a “harp” – a U-shaped wire frame that fits into slots around the bulb socket. The lampshade then sits on top of the harp, secured by a decorative “finial” that screws onto the harp’s threaded top post.
- First, clip the harp into place on the saddle (the part around the socket).
- Rest the lampshade on the harp.
- Screw the finial onto the top of the harp, tightening it just enough to hold the shade securely without crushing it.
- Spider fitter style: Some shades have a “spider fitter” built into the top ring of the shade. This is a metal ring with three or four spokes that connect to a central hole. This hole then sits directly on top of the lamp’s socket, often secured by a socket ring that screws onto the socket.
- If using this style, unscrew the socket ring from the lamp socket.
- Place the lampshade’s spider fitter over the socket.
- Screw the socket ring back on over the spider fitter, hand-tightening it to hold the shade firmly.
- Clip-on style: Smaller lampshades, or those for candelabra bulbs, sometimes simply clip directly onto the light bulb itself. This is the simplest method.
- Drum or cylinder shades: These often attach directly to the top of the pole or a special fitting. Follow your specific lamp’s instructions carefully. Some might have a diffuser disc that sits at the bottom of the shade to soften the light.
- Orient the shade: Once attached, adjust the shade to ensure it’s straight and doesn’t look lopsided.
Inserting the Light Bulb
This step is pretty self-explanatory, but it’s important to use the correct bulb.
- Check wattage and type: Refer to the lamp’s maximum wattage rating, usually found near the socket or in the manual. Exceeding this can be a fire hazard. Also, ensure you have the correct bulb base (e.g., E26 standard, E12 candelabra).
- Screw in gently: Carefully screw the bulb into the socket clockwise until it’s snug. Don’t overtighten, as this can make it difficult to remove later or damage the socket.
- LED recommendation: For bedside lamps, LED bulbs are highly recommended. They produce less heat, consume significantly less energy, and last much longer than incandescent bulbs. Many also offer dimmable options, which is great for bedside use.
Strategic Placement for Optimal Bedside Lighting
Where you put your bedside floor lamp makes a huge difference in its functionality and how it contributes to the room’s overall feel. It’s not just about filling a corner; it’s about intentional lighting.
Positioning for Reading and Task Lighting
The primary role of a bedside lamp is often for reading in bed or other small tasks.
- Height is key: For comfortable reading, the bottom of the lampshade should be roughly at shoulder height when you’re sitting up in bed. This allows the light to illuminate your book or device without shining directly into your eyes or your partner’s eyes. If the lamp is too tall, the light might hit your eyes; too short, and the light won’t spread far enough.
- Distance from the bed: Place the lamp close enough so that the light cone falls directly over your reading material. Typically, this means placing it slightly behind and to the side of your shoulder, about 6-12 inches from the headboard or the edge of your bed. Test it out by sitting in your usual reading position to see where the light falls best.
- Avoid obstructions: Make sure the lamp isn’t blocked by the headboard, a nightstand, or decorative pillows. The light needs a clear path to your reading area.
- Consider the lampshade material: A translucent or light-colored shade will allow some ambient light to diffuse, while an opaque shade will direct light more focused downwards and upwards. For reading, a downward-focused light is often best.
Enhancing Room Ambiance
Beyond reading, a bedside floor lamp can significantly contribute to the room’s mood and visual appeal.
- Creating soft zones: Use the lamp to create a warm, inviting glow that contrasts with brighter overhead lighting. This is perfect for winding down in the evening.
- Balancing light: If you have overhead lighting, use your floor lamp to add a lower, softer layer of light, reducing harsh shadows and making the room feel more balanced.
- Highlighting features: The light from a floor lamp can subtly highlight a texture on a wall, a piece of art, or a decorative object, adding depth to the room.
- Visual weight and balance: A floor lamp can add visual weight to a corner or beside the bed, especially if your bed is large or has a tall headboard. Consider how it balances with other furniture in the room. If you have a large room, two lamps (one on each side of the bed) can create symmetry and provide ample light.
Safety Considerations for Placement
Safety should always be a top priority when placing electrical appliances.
- Clearance from curtains and fabrics: Ensure the lampshade and bulb are a safe distance (at least 6-12 inches) from curtains, bedding, or any other flammable fabrics. Even LED bulbs, which run cooler, can pose a risk if continuously in contact with fabric.
- Stable surface: Make sure the lamp is on a flat, stable surface. If your floor is uneven, consider a small, stable riser (though it’s usually better to address the uneven floor itself). Avoid placing it on thick, plush carpets where it might wobble excessively.
- Cable management: Position the lamp so its power cord isn’t a tripping hazard. Run the cord along the wall or behind furniture. Use cord clips if necessary to secure it. Never run cords under rugs, as this can cause them to overheat or get damaged.
- Accessibility to the switch: Ensure the lamp’s switch (whether a foot switch, pull chain, or rotary switch) is easily accessible from your bed. You don’t want to be reaching awkwardly in the dark.
Wiring and Powering Your Lamp
Once assembled and positioned, it’s time to get the electricity flowing. This is usually the easiest part, but there are a couple of important things to keep in mind.
Plugging into a Wall Outlet
This is typically a straightforward step, but a bit of forethought helps.
- Identify an accessible outlet: Choose a wall outlet that is conveniently located near your bedside lamp. Ideally, it should be an outlet that isn’t already overloaded with other high-power devices.
- Avoid overcrowding: Don’t plug your lamp into an outlet that already has multiple power strips or adapters. While a floor lamp doesn’t draw a massive amount of power, it’s always good practice to avoid overloading circuits.
- Ensure proper fit: The lamp’s plug should fit snugly into the outlet. If it feels loose or wobbly, the outlet might be worn out and should be checked by an electrician. Never force a plug into an outlet.
- Grounding: Most modern floor lamps will have a two-prong (unpolarized) or three-prong (grounded) plug. If your lamp has a three-prong plug, ensure you’re plugging it into a three-slot grounded outlet. Using an adapter that bypasses the ground can be a safety risk.
Cable Management and Safety
Messy cables aren’t just an eyesore; they can be a safety hazard.
- Route discreetly: Try to route the power cord along the wall, behind your nightstand, or under your bed frame. The goal is to keep it out of the main walking path.
- Use cord clips or ties: For longer cords or if you need to secure them along furniture legs, use adhesive cord clips or Velcro cable ties. These keep the cord neat and prevent it from snagging or becoming a tripping hazard.
- Never run cords under carpets or rugs: This is a crucial safety rule. Cords can get pinched, damaged, or overheat when hidden under carpets, leading to fire risks. They can also degrade unnoticed.
- Inspect cords regularly: Periodically check the lamp’s cord for any signs of wear, fraying, or cracking. If the cord is damaged, stop using the lamp immediately and replace the cord (if safe to do so and within your skill set) or the entire lamp.
- Avoid tight bends: Don’t bend the power cord at sharp, extreme angles, as this can damage the internal wiring over time.
Using Dimmers or Smart Plugs (Optional Enhancements)
To take your bedside lighting to the next level, consider adding these optional smart features.
- In-line dimmers: If your lamp doesn’t come with a dimmer but you want adjustable light, you can often purchase an in-line dimmer switch. These are usually simple to install, requiring you to cut the lamp’s power cord and connect the dimmer in between. Always follow the dimmer’s instructions carefully and ensure it’s rated for the type of bulb you are using (e.g., LED dimmers for LED bulbs).
- Smart plugs: For an easy way to add smart functionality without modifying the lamp, a smart plug is an excellent option.
- Plug the smart plug into your wall outlet.
- Plug your bedside lamp into the smart plug.
- Connect the smart plug to your home Wi-Fi network using its companion app.
- Now you can control your lamp with your smartphone, voice commands (if integrated with a smart assistant like Alexa or Google Home), or schedule it to turn on/off at specific times. This is incredibly convenient for bedside use, letting you turn off the light without getting out of bed.
- Smart bulbs: Alternatively, you can use a smart bulb directly in your lamp’s socket. These connect to Wi-Fi or Bluetooth and can be controlled via an app, offering dimming, color changes, and scheduling features without needing a smart plug. Just ensure your lamp’s switch is always “on” for the smart bulb to receive power.
Final Adjustments and Enjoying Your New Lighting
You’re almost there! A few final touches will ensure your new bedside lamp is perfect.
Testing and Fine-Tuning Light Direction
Once everything is plugged in and powered on, take a moment to evaluate the light output.
- Sit in your bed: Get into your typical reading or lounging position.
- Check the light spread: Does the light adequately illuminate your reading material without glare? Is it too bright or too dim for your preferences?
- Adjust the lampshade: Some lampshades can be tilted slightly. Experiment with angles to direct the light exactly where you need it. If your lamp has an adjustable arm or head, fine-tune its position.
- Evaluate shadows: Look for any harsh shadows cast by the lamp itself or other furniture. Slight repositioning of the lamp or rotating the shade can often mitigate these.
- Consider bulb temperature: If you didn’t think about it before, now is a good time to observe the color temperature of your bulb. “Warm white” (around 2700K-3000K) is generally preferred for bedrooms as it creates a cozy, relaxing atmosphere, while “cool white” (4000K+) can feel too stark and stimulating for a bedside setting. If you’re not happy, a different bulb can make a big difference.
Organizing Your Bedside Area
A new lamp can inspire a bit of tidying up around your bed.
- Declutter the nightstand: With your lamp in place, re-evaluate your nightstand. Remove anything you don’t frequently use. A clear surface contributes to a calmer, more organized feel.
- Essentials only: Keep only your most-used items on the nightstand – perhaps a book, a glass of water, your phone charger, and a small decorative item.
- Charging cables: If you charge your phone or other devices near your bed, use cable clips or a small cable organizer to keep charging cords neat and tidy. This prevents them from getting tangled with the lamp cord or falling off the nightstand.
- Remote control hub: If you have multiple remotes (TV, fan, smart devices), consider a small tray or remote caddy to keep them contained and within reach.
Regular Maintenance for Longevity
A little care goes a long way in keeping your lamp looking good and functioning well.
- Dust regularly: Dust can accumulate on lampshades, bulbs, and bases, dulling the light and making the lamp look neglected. Use a soft, dry cloth or a duster to gently clean all surfaces. For fabric lampshades, a lint roller or a soft brush can work wonders.
- Check connections: Periodically, give the pole sections a gentle twist to ensure they haven’t loosened over time. If your lamp has a finial, make sure it’s still snug.
- Inspect the cord: Re-check the power cord for any signs of wear or damage. If you notice any issues, address them immediately.
- Clean the bulb (when off and cool): A dusty bulb can reduce light output. When the lamp is off and cool, gently wipe the bulb with a dry, soft cloth.
- Replace bulbs as needed: When a bulb burns out, replace it promptly with one of the correct type and wattage. Consider upgrading to an LED if you haven’t already.
By following these practical steps, you’ll have your bedside floor lamp installed and perfectly illuminating your space in no time, making your bedroom a more inviting and functional retreat. Enjoy your new lighting!